

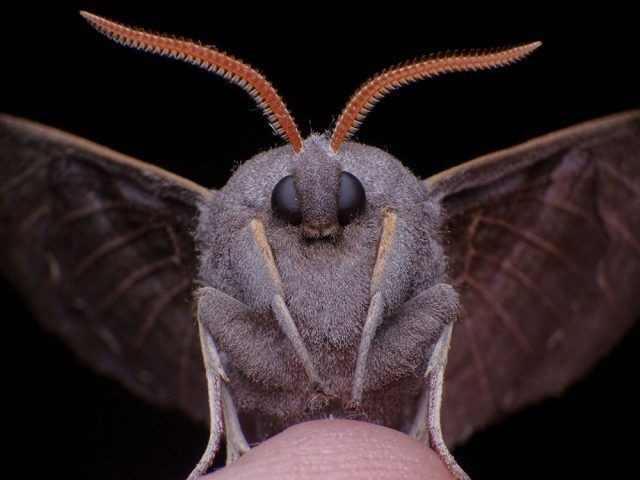
Fotografía de Johan J.Ingles-Le Nobel
Extreme macro photography takes us into the world of the tiny, revealing details that are practically invisible to the naked eye. To achieve this, photographers rely on specialized techniques and equipment. Among all of them, some accessories stand out above the rest: microscope objectives.
Extreme magnifications
One of the reasons, but not the only one, why microscope objectives are so popular is quite obvious: their ability to achieve extremely high magnifications. While conventional macro lenses can offer magnifications up to 1:1 (life size), extreme macro aims for a reproduction ratio usually between 2:1 and 10:1, something (almost) only achievable with microscope objectives.
Another reason is the price. As we will see below, it is possible to acquire a microscope objective of more than acceptable quality at a surprisingly low price compared to what is common in photography.
Microscope objectives: infinite and finite
When it comes to using microscope objectives in extreme macro photography, one of the key aspects to consider is the choice between infinite and finite objectives. Each type has its own advantages and limitations, and the choice largely depends on the photographer’s preferences and the demands of each situation. Below, we will explore both types in more detail:
Infinite objectives
These objectives are called “infinite” because, by themselves, they cannot focus on any point. To focus, they require the help of a converging lens placed between the objective and the camera sensor. Despite this added complexity, infinite objectives usually offer great quality in terms of sharpness and aberration correction, and allow more flexible adjustment. They are often the choice of experienced photographers due to their superior performance.
As a converging lens, the use of Raynox close-up lenses is popular. In our review of the Raynox DCR-250, we explain how to use it to work together with infinite objectives.
Finite objectives
Finite objectives, on the other hand, must be mounted at a specific distance from the sensor but can focus without the use of intermediate lenses. They are easier to adapt and generally have a lower price than infinite objectives. This makes them a popular choice for those starting out in extreme macro photography.
Ultimately, the choice between infinite and finite objectives depends on the specific needs of each person. Photographers seeking the highest quality opt for infinite objectives, while those who simply want to experiment without spending too much prefer the ease of use of finite objectives. The most important thing is to understand the characteristics of each type and choose the one that best suits what we are looking for.
Dry and immersion objectives
Within these two categories, there are also two types of objectives: dry and immersion. Dry objectives work similarly to conventional photographic lenses, while immersion objectives require a liquid medium (usually oil, but also water, glycerin, or a combination of these) between them and the specimen to be photographed. In extreme macro, dry objectives are used, whether infinite or finite.
Key features of microscope objectives
When looking for an objective, we will need to pay attention to the information printed on it:

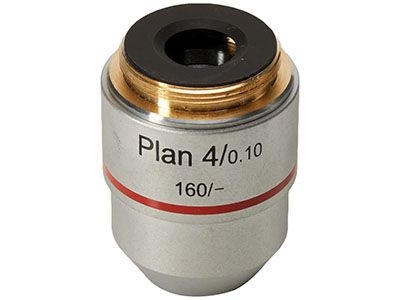
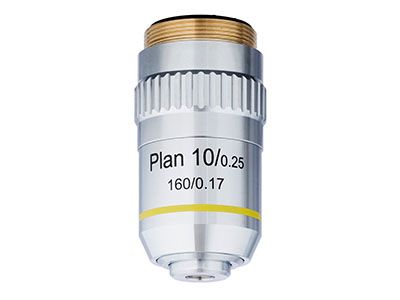
- Plan, Plan Acro, or Plan Apo: Plan objectives correct spherical aberrations; Plan Acro objectives correct both spherical and chromatic aberrations; Plan Apo objectives correct spherical aberrations and are completely free of chromatic aberrations. If nothing is indicated, the objective does not correct any aberrations (and our images will require more post-processing adjustments).
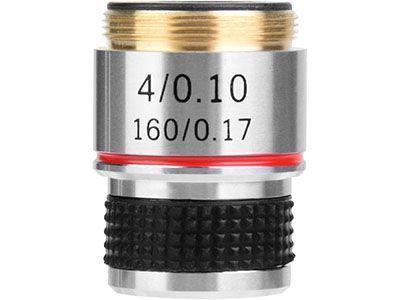
- Magnification: Microscope objectives offer a specific magnification, such as 2x, 4x, 10x, etc. This is usually indicated by the largest number printed on the objective (in the case of the objectives shown in the image, the numbers are 100, 40, 10, and 4).
- Numerical Aperture: Numerical aperture is a value that indicates the objective’s ability to gather light. It usually appears next to the magnification number, separated by a slash (in the objectives shown, the values are 1.25; 0.65; 0.25; and 0.10). The higher the numerical aperture, the more light enters the objective. This value is directly related to the objective’s resolution and the quality of the images we can obtain: more light means sharper images.
- Tube Length: Indicated by a number, for example, 160 on a finite objective. It refers to the distance at which we should place the objective from the sensor—in this case, 160 mm. On infinite objectives, the symbol ∞ is shown.
- Cover Glass: Next, there is a value (0.17). This refers to the thickness of the cover glass that should be used in a microscope. This information is not relevant in extreme macro photography.
- Working Distance: Although it is not usually indicated on objectives, working distance is a crucial specification. It refers to the gap between the objective and the sample to be photographed in order to focus properly. In microscopy, the working distance decreases as magnification increases, sometimes reducing to just one or two millimeters when working with magnifications above 10x. It is important to note that not all objectives with the same magnification have the same working distance, so it is essential to check the specific information about the objective you are interested in before purchasing it, especially when looking for very high magnifications. This way, you avoid having to be practically touching the sample to achieve correct focus.
Things to keep in mind
That the sweet spot of the lens is at a certain distance does not mean we can’t move away from it. At a shorter distance, we get less magnification; at a longer distance, more. In any case, it’s important to remember that as we shorten or stretch this distance, we lose sharpness.
Additionally, it is important to consider the size of our camera’s sensor. On smaller sensors, like APS-C or Micro 4/3, the field of view is narrower, producing an apparently higher magnification with the same lens compared to full-frame sensors.
We should also consider that microscope objectives are designed to project an image circle that in many cases is smaller than the area of full-frame sensors, so vignetting or loss of sharpness at the edges may occur. This is less common on APS-C and Micro 4/3 sensors, but it should be checked for lenses with very high magnifications or when used on full-frame cameras.
Finally, all lenses have a colored line that instantly indicates the lens magnification without needing to read the specifications.

How to adapt microscope objectives to photographic cameras
This is one of the most common questions when considering extreme macro photography. Most microscope objectives use a standard thread called the “RMS thread” (it’s not the only one, but it’s the most widespread). To use them, we need adapters from RMS thread to M42 (other combinations are very hard to find), which means we’ll be using several adapters simultaneously: from RMS to M42 (and from M42 to our camera mount when working with extension tubes) on the objective side, and from M42 to our camera mount on the camera body side if using bellows (if using tubes, this last adapter is not needed). You’ll find adapter links for all main mounts at the end of the post.
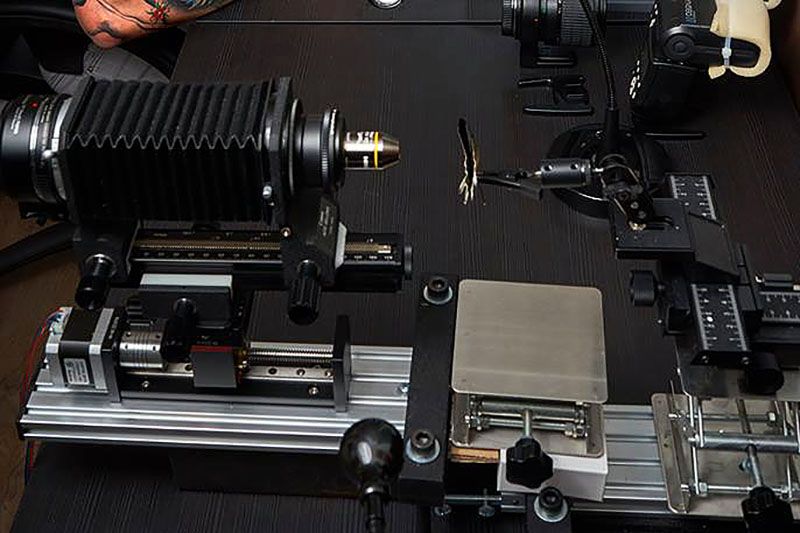
▌To adjust the distance between the camera sensor and the objective (remember the working distance mentioned above) and thus make use of its sweet spot, it’s best to use bellows—or extension tubes as a secondary option (you’ll likely need more than one set). These should be combined with a focusing rail, since at reproduction ratios of 2:1 or 3:1, hand-focusing becomes nearly impossible. Bellows not only help you reach the optimal working distance, but they also often include an integrated focusing rail (in the image, you can see bellows with their focus rail mounted on an automatic micrometric rail for extremely precise movements).
Batteries: don’t forget them
Focus stacking techniques and the continuous use of flash drain batteries quickly, so it’s essential to have a good supply. For projects that require taking dozens of photos over many minutes of work, the best solution might be using dummy batteries connected to an external power bank. This setup will prevent you from running out of power mid-session and potentially having to start over (related: Camera batteries and chargers: all models, original and third-party).
Microscope Objective Recommendation: Amscope 4x
An excellent option for those wanting to start experimenting with microscope objectives is the Amscope 4x. They offer great value for money, and the more basic models can be found for under €20. With them, you can achieve image quality not far behind that of much more expensive objectives.
In recent years, these objectives have become quite popular, although this has not yet affected their selling price.
Examples of photos taken with Amscope 4x objectives
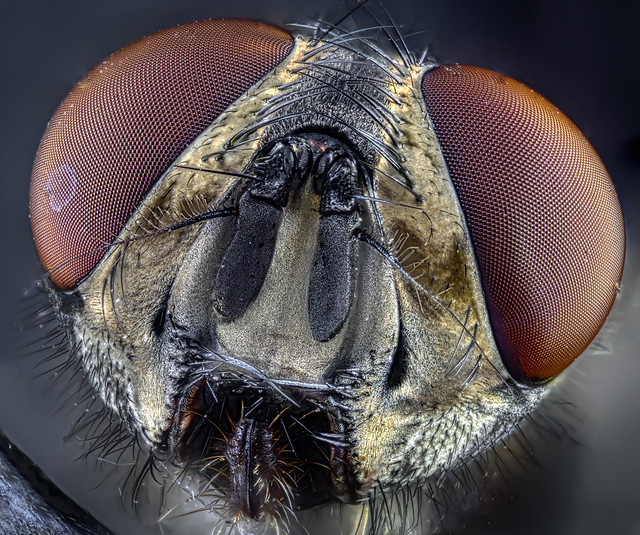
Image taken with a Nikon D5200

Image taken with a Panasonic DMC-GX80

Image taken with a Nikon D90
Conclusion
Extreme macro photography is a fascinating discipline that reveals a world of hidden details in our everyday surroundings. Microscope objectives are the best allies for photographers who wish to explore this tiny world, otherwise inaccessible by conventional means.
However, it’s important to remember that using microscope objectives in photography comes with technical challenges. But with patience and practice, photographers can unlock the magic of these lenses and capture stunning images.
Amscope Microscope Objectives
Amscope 4X
Amscope 4X Plan
Amscope 10X Plan
RMS thread adapters
- Solustre RMS to M42 adapter
- Pixco RMS to M42 adapter
- QUOTSTEOS RMS to M42 adapter
M42 thread adapters
- M42 lens adapters for Leica L cameras
- M42 lens adapters for Leica M cameras
- M42 lens adapters for Pentax K cameras
- M42 lens adapters for Micro Four Thirds (M 4/3) cameras
- M42 lens adapters for Fuji X cameras
- M42 lens adapters for Nikon F cameras
- M42 lens adapters for Nikon Z cameras
- M42 lens adapters for Canon RF cameras
- M42 lens adapters for Canon EF-M cameras
- M42 lens adapters for Canon EF / EF-S cameras
- M42 lens adapters for Sony E cameras
- M42 lens adapters for Sony A (Minolta AF) cameras
- As an Amazon Associate, this website earn from qualifying purchases.